AWSCLI 설치 및 환경 설정 방법
AWS 에서 Command Line Interface (CLI) 을 제공하며, 이를 이용하여 클라우드 관리자 또는 작업자가 더 쉽고 빠르게 작업을 진행할 수 있다.
이 글은 AWS CLI 설치와 credentials, config 파일의 환경을 설정하는 방법을 기술하였다.
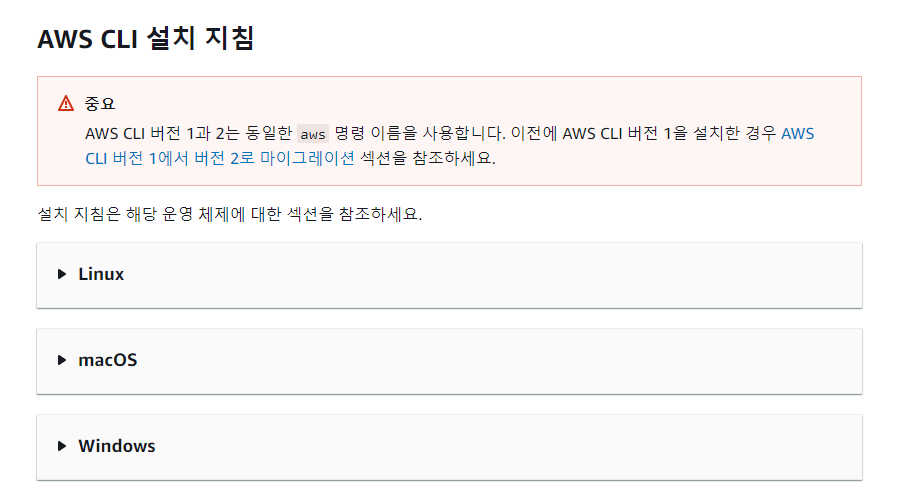
- 아래의 링크를 참고하여 AWSCLI 설치

https://docs.aws.amazon.com/ko_kr/cli/latest/userguide/getting-started-install.html
최신 버전의 AWS CLI 설치 또는 업데이트 - AWS Command Line Interface
설치 관리자의 아무 위치에서나 Cmd+L을 눌러 설치에 대한 디버그 로그를 볼 수 있습니다. 이렇게 하면 로그를 필터링하고 저장할 수 있는 로그 창이 열립니다. 로그 파일도 /var/log/install.log에 자
docs.aws.amazon.com
- "C:\사용자\[윈도우계정]\.aws" 폴더 생성
[윈도우계정] 아래에 .aws 폴더를 생성한다.

- config 파일 생성 및 설정
config 빈 파일 생성 후 아래와 같이 region, output 을 설정한다. 저자는 profile 을 기본(default), 개발(dev), 스테이지(stage), 운영(prd) 4개를 설정하였다.

# config 파일

[profile default]
region = ap-northeast-2
output = json

[profile dev]
region = ap-northeast-2
output = json

[profile stg]
region = ap-northeast-2
output = json

[profile prd]
region = ap-northeast-2
output = json
- credentials 파일 생성 및 인증키 관련 설정
credentials 빈 파일 생성 후 AWS IAM 보안 자격 증명에서 "새 액세스 키 만들기" 를 클릭하여 AWSAccessKeyId 와 AWSSecretKey 를 받는다. AccessKeyID는 일반 웹사이트의 ID를 뜻하며 SecretKey는 비밀번호를 뜻한다.

새 액세스 키 만들기를 클릭하면 액세스 키가 발급된다.

위에서 발급 받은 2개의 key 를 credentials 파일에 넣어주면 설정을 완료하게 된다.
(아래 Key는 예제로 위의 발급받은 키를 입력한다)
role_arn = arn:aws:iam::[계정ID]::[[AsuumeRole]]
# credentials 파일

[default]
aws_access_key_id = BAIETWIO5G3GOCGO6FWW
aws_secret_access_key = SdsN0YGQ3xbiczMUBSde4ycg9Lv0sjSb+LHo428P

[dev]
role_arn = arn:aws:iam::245381281484:role/IAM-Architect-AssumeRole
source_profile = default

[stg]
role_arn = arn:aws:iam::538223344283:role/IAM-Architect-AssumeRole
source_profile = default

[prd]
role_arn = arn:aws:iam::416454585933:role/IAM-Architect-AssumeRole
source_profile = default
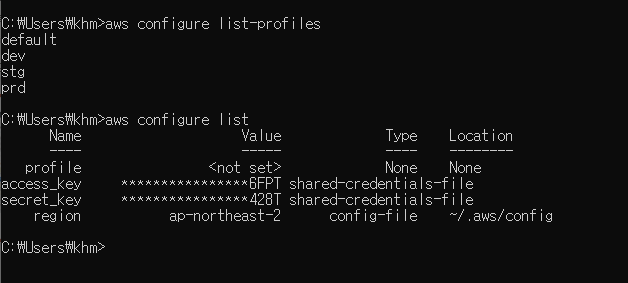
- profile 설정 확인

반응형
'AWS > AWS SDK for Python' 카테고리의 다른 글
| AWS SDK (Boto3) 를 이용한 CloudWatch DB Log to Excel Download (0) | 2022.08.29 |
|---|
댓글